Hidden SSIDs are not a security feature
Despite the popular belief with some IT departments and technologists that hiding SSIDs is a security feature. On the surface this makes sense, after all how can you connect to something that you don't know is there. There was a point in time when many wireless networks were open and this was a useful feature if there was some reason you needed the network to be open and you didn't want people randomly connecting since for most users the "if you can't see it you can't connect to it" mantra was true enough. The problem is that anyone can use some basic tools to not only find out that your network exists but they can decloak them to recover the name which is what this post will look at. Just sitting in my house writing I can see 3 hidden SSIDs that are open, presumably because people felt like if they hide them there is no need to secure them. For this post I will show how we can decloak these types of networks and connect to them[1].
Getting the basics out of the way
In order to follow along with this post you will need a few things to get started.
- Kali Linux or a Linux install with the tools used below
- Wireless card capable of monitor mode and packet injection[2]
- The name of your wireless card
Learn more about compatible wireless cards
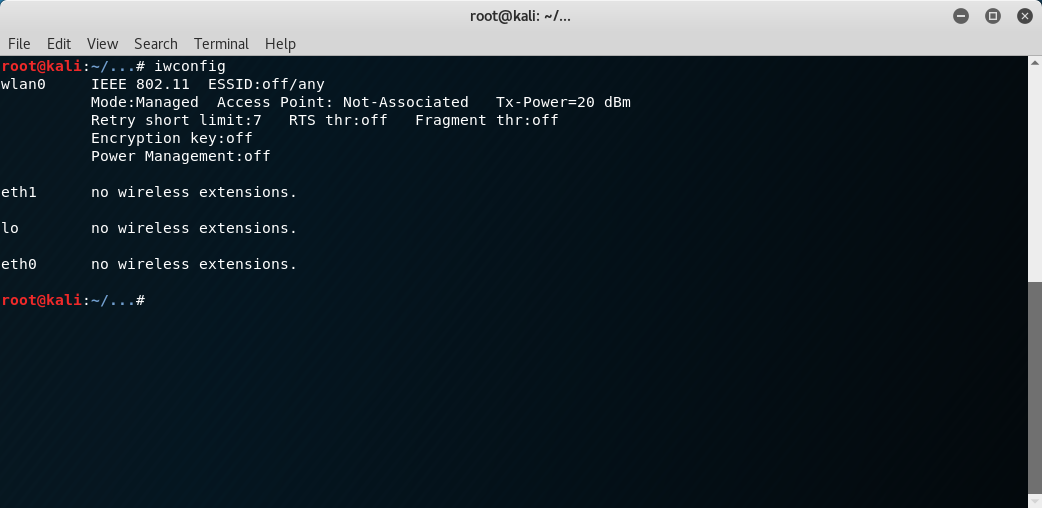
If you don't know the name of your wireless interface you should be able to simply run the command iwconfig and look for devices with wireless extensions listed. Typically they will have the name wlan followed by a number, for example wlan0.
Put the interface into monitor mode
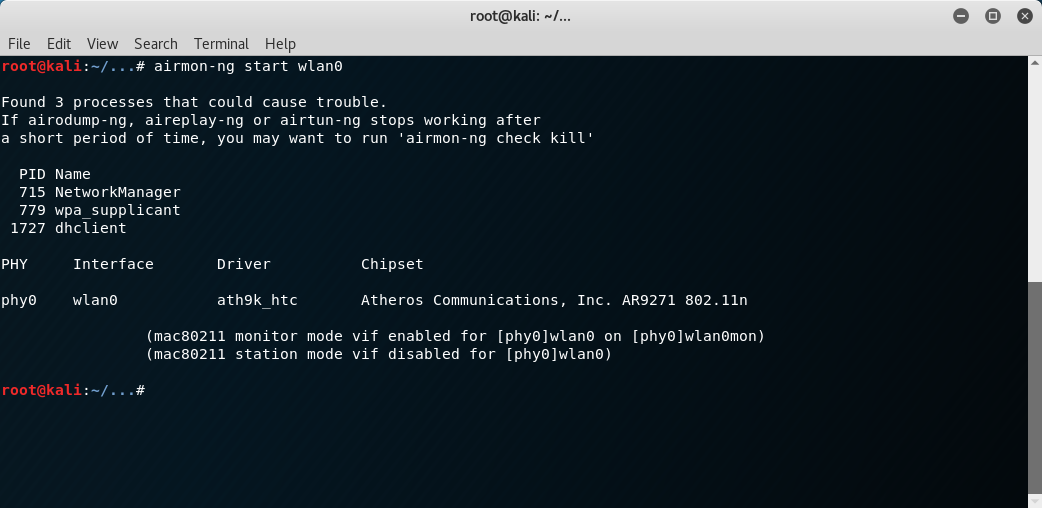
Once you have the name of your interface you will want to put the interface into monitor mode. You can do this multiple ways but my preferred way is by typing airmon-ng start <interface>. This command should create a new interface with the same name as your old interface plus the word mon. For example wlan0mon is the interface created on my system.
Finding Hidden SSIDs
The first step to our ultimate goal of decloaking a hidden SSID is to find it. To do this we are going to monitor management frames on the various wireless channels. The management frames are typically unencrypted and visible to anyone listening on the channel. There are two tools that we can use for this goal and i'll provide a brief overview of using each. The information we are going to look for here is 1. the BSSID of the AP and 2. the channel the AP is on.
Our tools of choice here will be either:
airomon or kismet
airomon
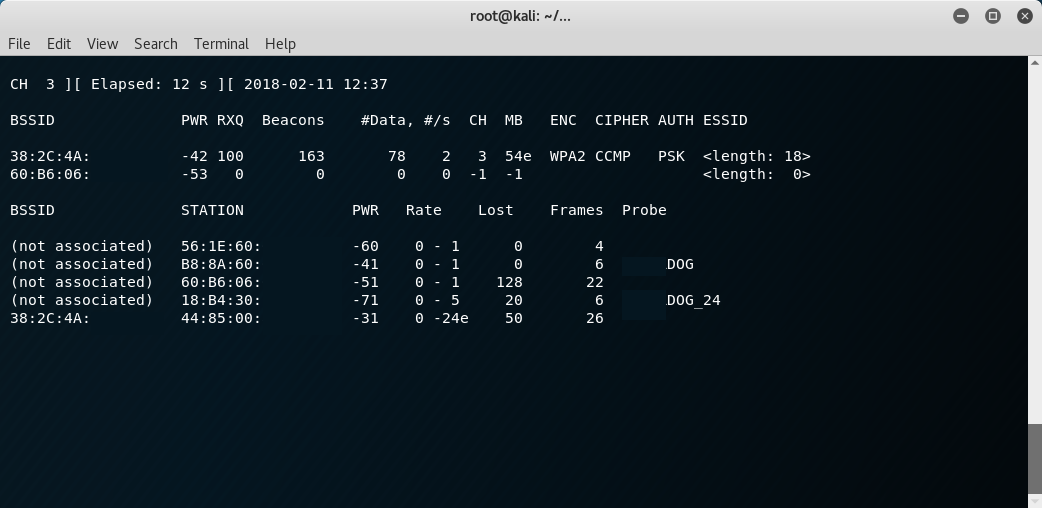
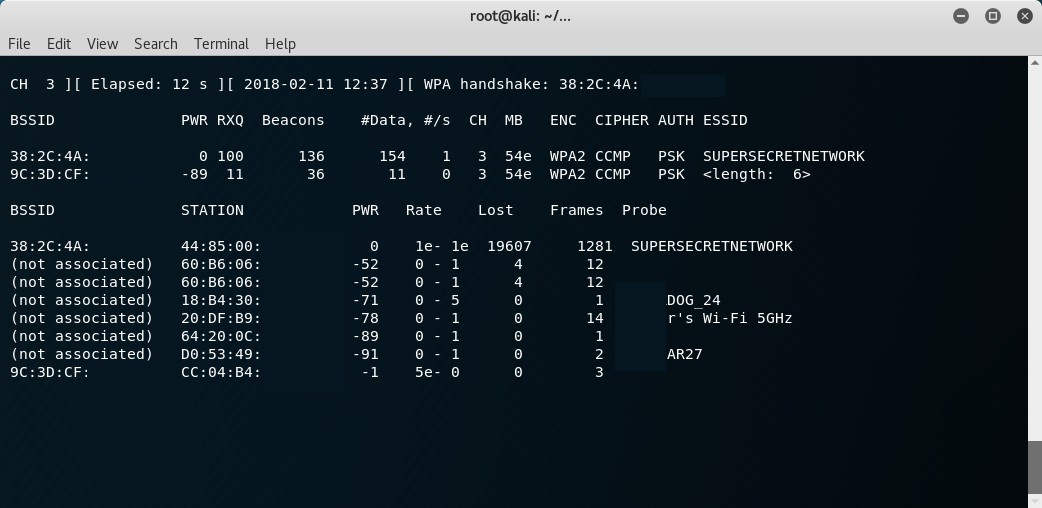
Once placing the interface into monitor mode is complete you will want to get a list of all APs that you are able to see. To do this fire up airodump using the command airodump-ng <montior interface> which will start scanning for wireless access points within range or if you want only hidden APs then add the --essid "" option[3]. APs with cloaked ESSIDs will have a name <length: 0> instead of a name like "SuperSecureWifi". Take a note of the ESSID you want to decloak and make note of it's BSSID and channel number. After you have this information you have a few options to decloak the network. One choice that works well for a busy AP is to simply restart airodump and set it to the channel of interest airodump-ng -c <chan> --bssid <bssid> <monitor interface> and watch for the ESSID to be shown. On networks that are not very busy this may take a while. After the kismet section we will see how to accelerate this by performing a deauthentication attack.
kismet
An alternative to monitoring for SSIDs is using kismet. To do this first launch kismet with the command kismet_server -c <monitor interface> then in a new terminal launch the kismet client kismet_client. This may bring up a prompt about running as root if you are using the root user in Kali or another linux distro. After kismet starts to show SSIDs I then like to go up to sort and click on SSID. Then I will look in the list for a cloaked SSID with at least one client connected to it which can be done by using your arrow keys or the mouse to select different entries.
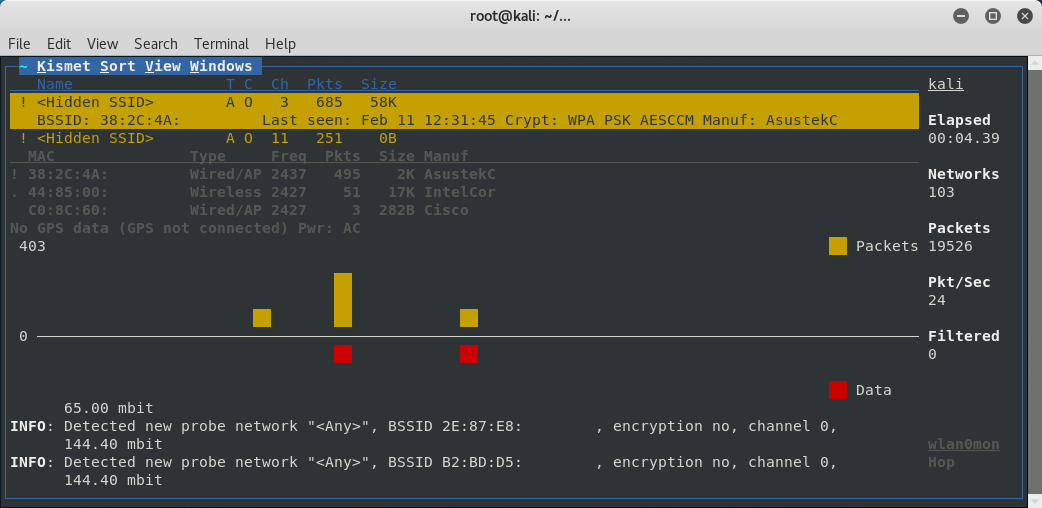
Once I find one I want to target I will go up to the Kismet menu and select Config Channel and select Lock and set the channel to the channel the AP of interest is using.

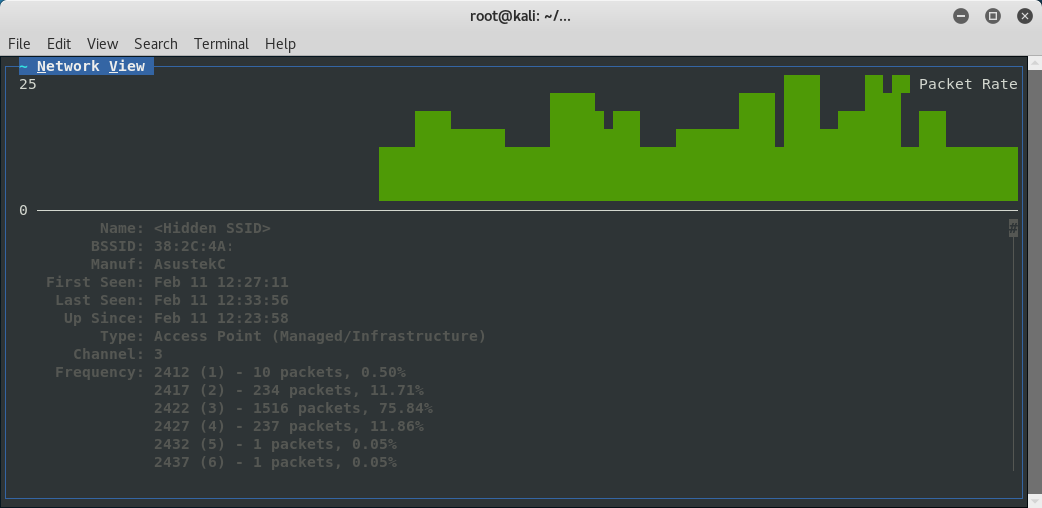
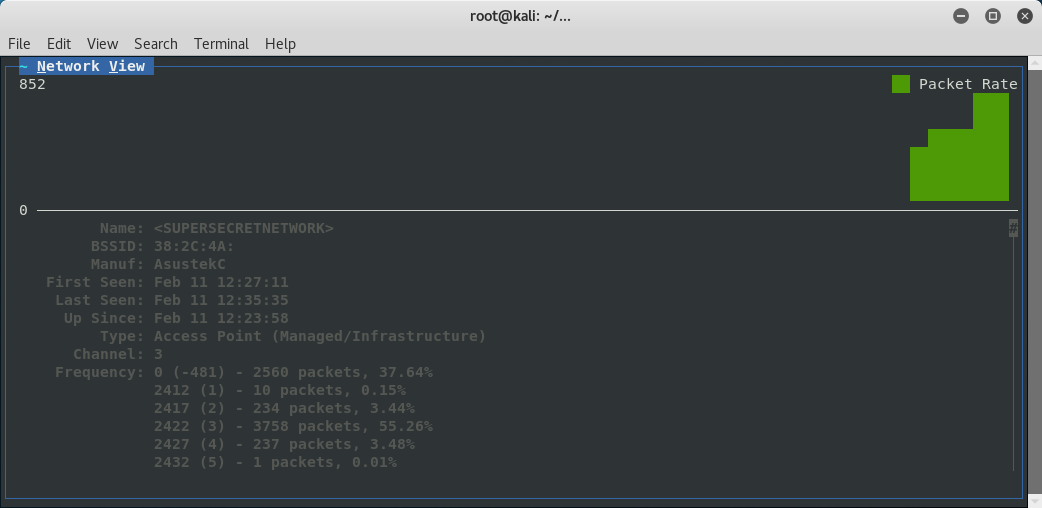
Then once this is done I will go back to the list and highlight my AP of interest to get the network view.
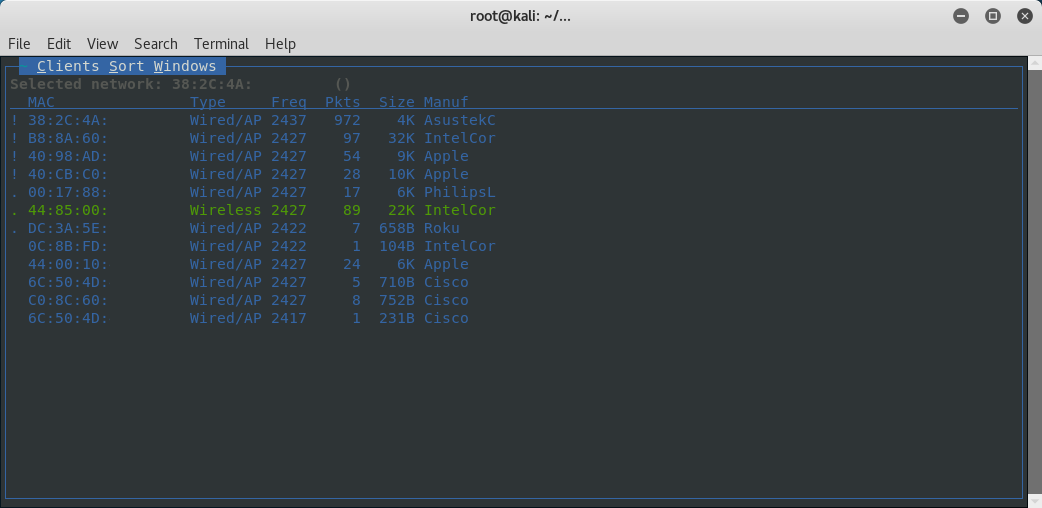
and then select view and clients to see a list of the connected clients.
At this point just like with airodump you could wait for a client to connect to see the SSID decloak but we will accelerate this by performing a deauthentication attack now.
Deauthenticating
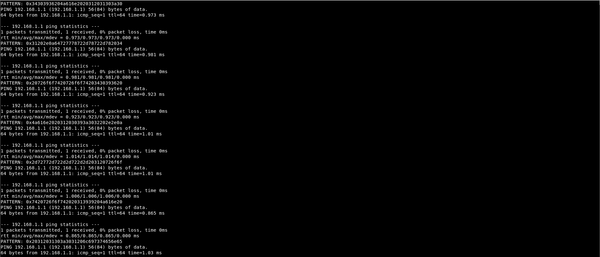
Accelerating the decloaking of the SSID can be done by using the command aireplay-ng -0 10 -a [bssid] which will cause 10 deauth frames to be broadcast "from" that BSSID. This can be made more effective if you saw clients when watching this SSID previously in which case you can use the above command with the -c [client's mac] option to target that wireless client. For this to work well the monitor interface needs to be on the correct channel so it is important that you have either airodump or kismit running in another window with the channel set. Once this is done you should be able to quickly deauth a client and watch the SSID when the reconnect.
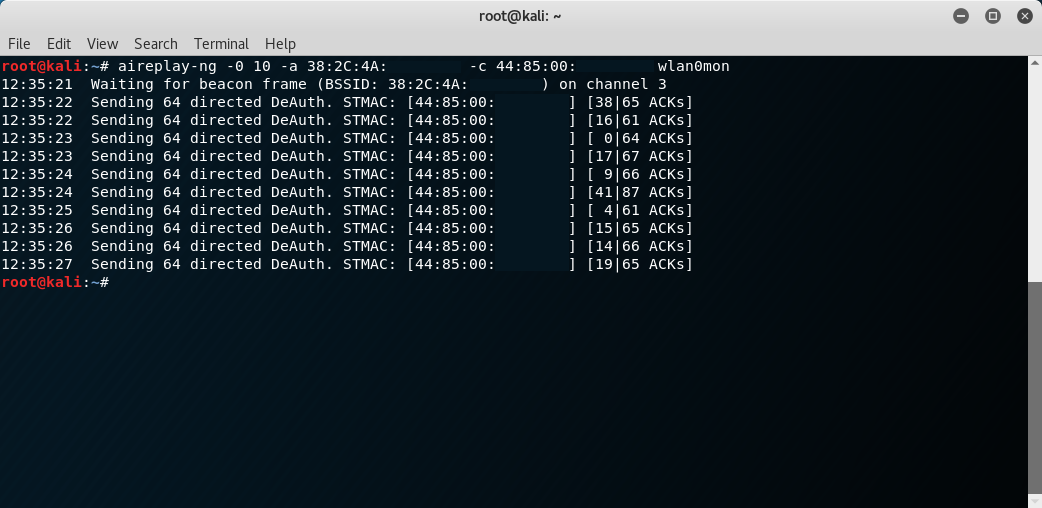
As you can see below both airmon and kismet now show the decloaked essid.
All networks used in this post are owned by me and setup for the purpose of this demonstration. The purpose of this post is to help consumers and professionals understand that hidden SSIDs are not a security feature, not to teach you how to break into your neighbors WiFi. ↩︎
This can actually be done without the ability to inject packets but it requires you wait for a client to connect to the network which depending on the network could be a very long time. ↩︎
If you use the --essid option you will need to clear this to see the decloaked SSID, otherwise when it is decloaked it will be removed from the list since it no longer meets the empty essid requirement. ↩︎